
Qoddi automatically builds your Laravel app from your code.
In order to do that, Qoddi uses buildpacks to detect and build your app automatically.
Before Building your code
To be able to build your app, Qoddi needs a composer.json and a composer.lock files committed in your repository. You should remove the vendor folder from your repository before building your app.
Create your app on Qoddi
Create a new app and link it with your repository using SSH keys.
Read this article for a detailed procedure or check this video :
Prepare your app
You can create a new laravel project locally by using composer create :
composer create-project laravel/laravel --prefer-dist test_qoddiThen, initialize a git repository and commit your code :
git init
Initialized empty Git repository in ~/test_qoddi/.git/
git add .
git commit -m "new laravel project"
Procfile
Procfile is used to instruct the Qoddi cluster to route the traffic to the correct file, a default Procfile for Laravel would be like that :
web: vendor/bin/qoddi-php-apache2 public/You can also use Nginx by using this Procfile :
web: vendor/bin/qoddi-php-nginx public/Note : public/ is the standard default root directory for Laravel.
Qoddi supports Apache 2.4 (2.4.48) and Nginx 1.18 (1.20.1) as Web servers.
Setting a Laravel encryption Key
The application’s encryption key is used by Laravel to encrypt user sessions and other information. Its value will be read from the APP_KEY environment variable.
You can run php artisan key:generate --show locally, this will display a key you can add to your app environment variable BEFORE building your application for the first time. Environment variables can be set on the App settings page.
Configuring reverse proxy
Qoddi routes the request to your app through a layer of Nginx reverse proxies. This proxy is responsible, among other things, to route the SSL traffic and negotiate the SSL certificates.
This means that requests received by an app will always be made using the HTTP protocol, even if the original request was made over HTTPS.
FlashDrive provides the original request information in X-Forwarded-… headers and since Laravel uses components from the Symfony framework for HTTP request handling, it can easily be configured to trust such headers.
Do not make Laravel trusting the Forwarded and X-Forwarded-Host headers, because Qoddi doesn’t set those headers.
PHP Version
You can select the version of PHP using the composer.json file, for example :
{
  "require": {
    "php": "^7.4.19"
  }
}
Check the PHP Support page to see the current version supported by Qoddi
If you don’t specify a version, Qoddi will automatically use the latest version of PHP7 or PHP8.
composer.json
composer.json is mandatory.composer.lock must also be present. To generate the composer.lock file run composer install locally before pushing your code.
It’s a good practice to remove the /vendor folder from your Git repository as it will be ignored during the build process.
Qoddi doesn’t install development dependencies from the require-dev section of composer.json
Built-in extensions
The following table lists which of the built-in extensions that are bundled with PHP are available for each release series of PHP, and whether the extension in question is loaded by default, or whether it has to be explicitly enabled via composer.json.
| Extension | PHP 7.4 | PHP 8.0 |
|---|---|---|
ext-bcmath | ✱ | ✱ |
ext-bz2 | ✔ | ✔ |
ext-calendar | ✱ | ✱ |
ext-ctype | ✔ | ✔ |
ext-curl | ✔ | ✔ |
ext-date | ✔ | ✔ |
ext-dom | ✔ | ✔ |
ext-exif | ✱ | ✱ |
ext-fileinfo | ✔ | ✔ |
ext-filter | ✔ | ✔ |
ext-ftp | ✱ | ✱ |
ext-gd | ✱ | ✱ |
ext-gettext | ✱ | ✱ |
ext-gmp | ✱ | ✱ |
ext-hash | ✔ | ✔ |
ext-iconv | ✔ | ✔ |
ext-imap | ✱ | ✱ |
ext-intl | ✱ | ✱ |
ext-json | ✔ | ✔ |
ext-ldap | ✱ | ✱ |
ext-libxml | ✔ | ✔ |
ext-mbstring | ✱ | ✱ |
ext-mcrypt | – | – |
ext-mysqli | ✔ | ✔ |
ext-mysqlnd | ✔ | ✔ |
ext-openssl | ✔ | ✔ |
ext-pcntl | ✱ | ✱ |
ext-pcre | ✔ | ✔ |
ext-pdo | ✔ | ✔ |
ext-pdo_mysql | ✔ | ✔ |
ext-pdo_pgsql | ✔ | ✔ |
ext-pdo_sqlite | ✱ | ✱ |
ext-pgsql | ✔ | ✔ |
ext-phar | ✔ | ✔ |
ext-posix | ✔ | ✔ |
ext-readline | ✔ | ✔ |
ext-reflection | ✔ | ✔ |
ext-session | ✔ | ✔ |
ext-shmop | ✱ | ✱ |
ext-simplexml | ✔ | ✔ |
ext-soap | ✱ | ✱ |
ext-sockets | ✔ | ✔ |
ext-sodium | ✱ | ✱ |
ext-spl | ✔ | ✔ |
ext-sqlite3 | ✱ | ✱ |
ext-tokenizer | ✔ | ✔ |
ext-xml | ✔ | ✔ |
ext-xmlreader | ✔ | ✔ |
ext-xmlrpc | ✱ | – |
ext-xmlwriter | ✔ | ✔ |
ext-xsl | ✱ | ✱ |
ext-zend-opcache | ✔ | ✔ |
ext-zip | ✔ | ✔ |
ext-zlib | ✔ | ✔ |
| ✔: enabled by default ✱: optional, can be enabled via composer.json |
Third-party extensions
The following table lists which third-party extensions are available for each release series of PHP. As these are distributed independently of the PHP runtime, their versions are also listed. They are never loaded by default and thus have to be explicitly enabled via composer.json.
| Extension | PHP 7.4 | PHP 8.0 |
|---|---|---|
ext-amqp | 1.10.2 | 1.11.0beta |
ext-apcu | 5.1.20 | 5.1.20 |
ext-blackfire | 1.63.0 | 1.63.0 |
ext-cassandra | – | – |
ext-ev | 1.1.2 | 1.1.2 |
ext-event (2.x) | 2.5.7 | – |
ext-event (3.x) | 3.0.4 | 3.0.4 |
ext-imagick | 3.5.0 | 3.5.0 |
ext-memcached | 3.1.5 | 3.1.5 |
ext-mongodb | 1.9.1 | 1.9.1 |
ext-newrelic (8.x) | – | – |
ext-newrelic (9.x) | 9.17.1.301 | 9.17.1.301 |
ext-oauth | 2.0.7 | 2.0.7 |
ext-pcov | 1.0.9 | 1.0.9 |
ext-phalcon (3.x) | – | – |
ext-phalcon (4.x) | 4.1.2 | – |
ext-pq | 2.1.8 | 2.1.8 |
ext-psr (0.x) | 0.7.0 | – |
ext-psr (1.x) | 1.0.1 | 1.0.1 |
ext-raphf | 2.0.1 | 2.0.1 |
ext-rdkafka (3.x) | – | – |
ext-rdkafka (4.x) | 4.1.2 | – |
ext-rdkafka (5.x) | 5.0.0 | 5.0.0 |
ext-redis (3.x) | – | – |
ext-redis (4.x) | – | – |
ext-redis (5.x) | 5.3.4 | 5.3.4 |
ext-uuid | 1.2.0 | 1.2.0 |
Using Optional Extensions
You can declare extensions that are not available directly inside the PHP buildpack using the Composer Platform Packages. Just add ext- as a prefix of the package name.
Example to install mcrypt, bcmath, Memcached, and the third party MongoDB extension:
{
    "require": {
        "ext-bcmath": "*",
        "ext-mcrypt": "*",
        "ext-memcached": "*",
        "ext-mongodb": "^1.1.0"
    }
}
Private Composer repositories
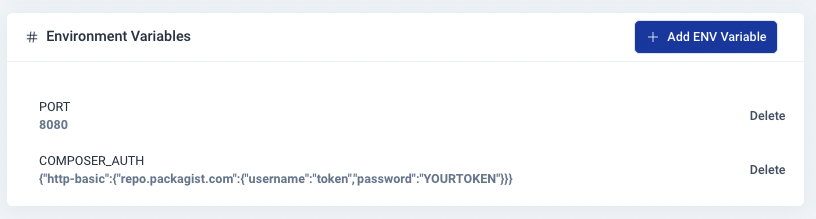
To use private composer repositories such as Private Packagist, you need to pass Authentification values as an environment variable.
Make sure to add this environment variable before requesting the build of your app or the build will fail :
The COMPOSER_AUTH environment variable is similar to the auth.json variable used on development environments :
When using GitHub Enterprise or the Self-Managed version of GitLab, remember to also set the github-domains or gitlab-domains config option inside your project’s composer.json.
Composer configuration
$COMPOSER_MEMORY_LIMITdefaults to the available app memory;$COMPOSER_MIRROR_PATH_REPOSdefaults to1;$COMPOSER_NO_INTERACTIONdefaults to1.
Build Behavior
The following is run during build unless composer.json is empty and no composer.lock is present :
composer install --no-dev --prefer-dist --optimize-autoloader --no-interactionNote: Qoddi will not install development dependencies from the require-dev section of composer.json.
Custom compile scripts
Custom compile scripts can be added into the composer.json in form of a single line or multiple arguments :
{
  "scripts": {
    "compile": [
      "php app/console assetic:dump --env=prod --no-debug",
      "MyVendor\\MyClass::postDeployComposerCallback"
    ]
  }
}
The custom compile command will be executed by the builder like this :
composer compile --no-dev --no-interactionDefault Behavior
The Default web server is Apache2, you can use Nginx by editing the Procfile but .htaccess files are not available with Nginx.
Qoddi will launch a Fast CGI Process Managed and treats your Git root folder as the document root of the application, serving the .php files directly from that folder. Subsequent folders are served as well and you can alter this behavior using a .htaccess file.
Apache is set up with a Virtual Host that will respond to all hostnames. The document root is set up to be reachable without limitations and AllowOverride All is activated to allow for the use of .htaccess files.
Apache Configuration (Not working with Nginx servers)
Similar to httpd.conf configuration you can create an apache_app.conf file inside the root directory of your app to alter the behavior of Apache. This can be especially useful if you need, for instance, to alter the behavior of the Proxy timeout settings (30 seconds by default). This file can also contain htaccess directives or any other directives you can set inside an httpd.conf file
Edit your Procfile to load the apache_app.conf file with the -C directive when your app starts :
web: vendor/bin/qoddi-php-apache2 -C apache_app.conf public/Nginx Configuration (Not working with Apache Servers)
The default Nginx configuration file, similar to sites_availables, included with FlashDrive PHP apps is basic :
location / {
	index  index.php index.html index.htm;
}

# for people with app root as doc root, restrict access to a few things
location ~ ^/(composer\.(json|lock|phar)$|Procfile$|<?=getenv('COMPOSER_VENDOR_DIR')?>/|<?=getenv('COMPOSER_BIN_DIR')?>/) {
	deny all;
}
You can add a nginx_app.conf at the root directory of your app and add more directives at the startup of your app, for example:
client_max_body_size 256m;More information about Nginx configuration files
Then edit the Procfile of your app to load this configuration file when your app starts with the -C directive:
web: vendor/bin/qoddi-php-nginx -C nginx_app.conf public/php.ini configuration file
To alter the default settings of the php.ini file, you can create a .user.ini file at the root directory of your app and starts your app (inside the Procfile) with the -i directive. Here’s an example of .user.ini directives :
post_max_size = 50
upload_max_filesize = 128M
max_execution_time = 60
rlimit_files = 35645
See the instructions in the PHP manual for more details.
You can use these to set any directive permitted in PHP_INI_ALL, PHP_INI_USER and PHP_INI_PERDIR contexts.
php-fpm configuration
Some of the php.ini values are not modifiable directly from the .user.ini file. For example to set the always_poplate_raw_post_data to -1 you will need to create fpm_custom.conf file with the following contents :
php_value[always_populate_raw_post_data]=-1Then, you’ll need to tell your application to start with -F directive and load the fpm_custom.conf file :
web: vendor/bin/qoddi-php-apache2 -F fpm_custom.conf public/In addition to php_value and php_flag for php.ini specific settings, any pool-specific PHP-FPM configuration directives are valid in that configuration file, so you can use it to fine-tune PHP-FPM’s behavior.
Note : .user.ini files are not evaluated if PHP is started with -F directive and a fpm_custom.conf file are present, all directives can be placed inside the fpm_custom.conf instead of .user.ini using the php_value tag.
Incorrect PHP-FPM configuration directives may easily cause your application to stop working or behave unexpectedly, so use with caution.
Maximum Execution Time
The maximum execution time of all PHP scripts is set to 30 seconds. This is governed by several configuration files at several levels of Qoddi’s infrastructure.
By design, it’s not recommended to increase this value but instead to optimize your scripts or to run large queries and processing files in the background (which are not limited to 30 seconds).
If you absolutely need to run scripts for more than 30 seconds this can be done by altering several configuration files :
.user.ini file :
max_execution_time = 300fpm_custom.conf :
request_terminate_timeout = 0apache_app.conf file (or nginx_app.conf with appropriate instructions) :
TimeOut 300
ProxyTimeout 300
Then edit your Procfile to load all configuration files at startup :
web: vendor/bin/qoddi-php-apache2 -i .user.ini -C apache_app.conf -F fpm_custom.conf public/Launch a Console Command
Please check this article on how to launch a command directly to your running app. This can be used to perform database migrations, launch local scripts, or perform database backups.
Ephemeral Disk
Contrary to Marketplace apps that can use Qoddi’s virtual disks features to store and retrieve persistent data, apps that are created from code use an immutable file system.
You can write data locally, for instance, to process files temporarily during your application life, but the data written into your app’s disk is not persistent and gets wiped out after your app restart.
All apps restart at least once every 24 hours, to apply a new setting or to deploy a new build.
To store data and keep it persistent you can use external services like Amazon S3 or Wasabi, an S3 compatible storage service with very affordable pricing.
Add a domain name
Please check this article for a detailed method on how to use your domain name with Qoddi’s apps.
Define environment variables
Note: Environment variables set in your app settings are injected during the build process. If the build of your app needs to use an env variable make sure to set it before requesting the build.
Qoddi lets you externalize the configuration of your app: the Qoddi cluster will automatically inject the data when the app starts or restart.
Environment variables can include any external data your app needs to run like external resources, databases addresses, encryption keys, etc…
To add an environment variable, access your app settings and click “Add ENV Variable” :
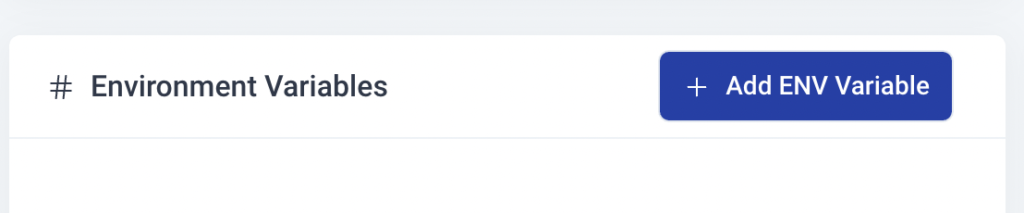
Enter the key (like DATABASE_USER) and the value and click “Add”. Qoddi will automatically add your environment variable and restart your app after a one-minute delay (to let you add more env variables if necessary without restarting the app each time a new variable is added).
Provision a database
Qoddi Marketplace includes all popular datastore engines including Mysql, Postgres, MongoDB, and Redis.
To add a database to your app, click on Marketplace and select the database you want to run, then create the new app database inside the same stack as your PHP app.
Once the app is running, visit the database app’s settings and retrieve the “internal name” :
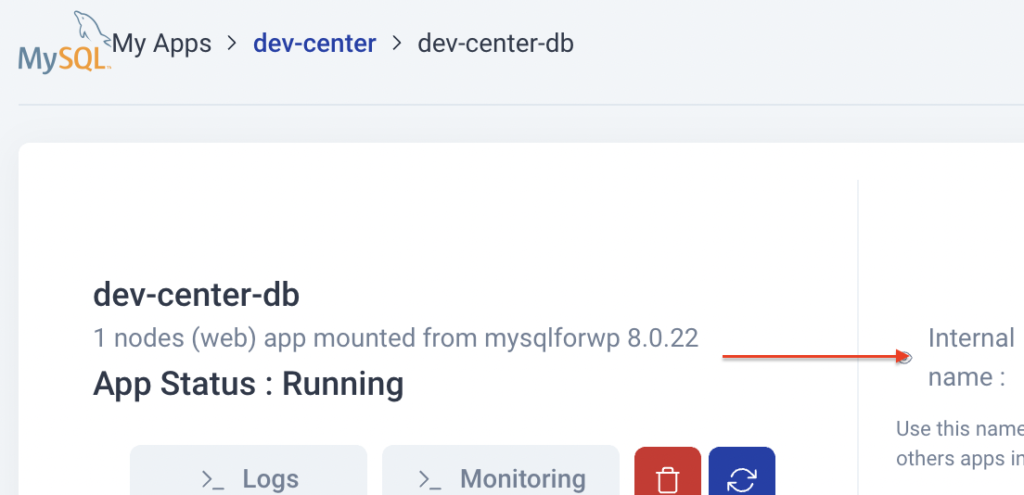
Use this internal name as you would use a server address, for instance for MySQL this name replaces the usual “localhost”. Some scripts require you to add the database port at the end of the server address. FlashDrive uses a common port for each database software, for MySQL it will be 3306 and you can write it like that inside your scripts: internal-name:3306
Postgres usually uses credentials sent inside the login URL, like that : postgres://<user>:<password>@<internalname>:5432/<database>
The login and password information is available inside the Environment Variables of the database app.
Note: Qoddi’s datastores run on a private and encrypted network. Therefore SSL support is deactivated for all datastores available on Qoddi. Ensure that your code doesn’t require using SSL before deploying your app.
Reach your app from another app
Inside your app stack, you can reach any other Qoddi app member of this stack on any port. Qoddi automatically routes the traffic internally and opens the appropriate port. By opposition, your app is only reachable on ports 80/443 from outside of Qoddi.
To reach your app internally, retrieve the internal name from your app settings page :
This name can be used to reach your app from another app inside the same stack. Use it in any form that works with your script :
http://<internalname>
<internalname>
http://internalname>:port
Note: https:// is not available, all the traffic inside apps is already encrypted by the cluster.
Encryption
Qoddi uses at rest encryption for the app virtual disks, build images, and encrypted transport from inside the cluster. To make sure the traffic is encrypted between your app and the browser of your users you can set up SSL certificates for any domain name connected to the app (including Qoddi’s default domain name).
Scale your App
From your app settings you can scale your app vertically and horizontally: by upgrading the app size (refer to our pricing for app sizes details) or by adding more nodes.
Additional nodes will run another copy of your app inside another Qoddi server located inside the same cluster (same geographical location). Traffic is automatically sent to the least occupied node by Qoddi’s load balancer.
Was this helpful?
4 / 2