This article covers the Git connection set up when you create your app on FlashDrive for any supported language. For a detailed git procedure after app deployment please check this article.
This tutorial is based on Github but the same can be done with any other Git software such as Gitlabs, Bitbucket etc…
The repository you are using must use the same language as your app settings (Node.js, PHP, Clojure, etc…) and must contain the mandatory settings files. Check Language Support for more information.
There is no FlashDrive-related configuration file required to build your app: FlashDrive will automatically build the image based on the software version you selected and use your configuration files to import all required components.
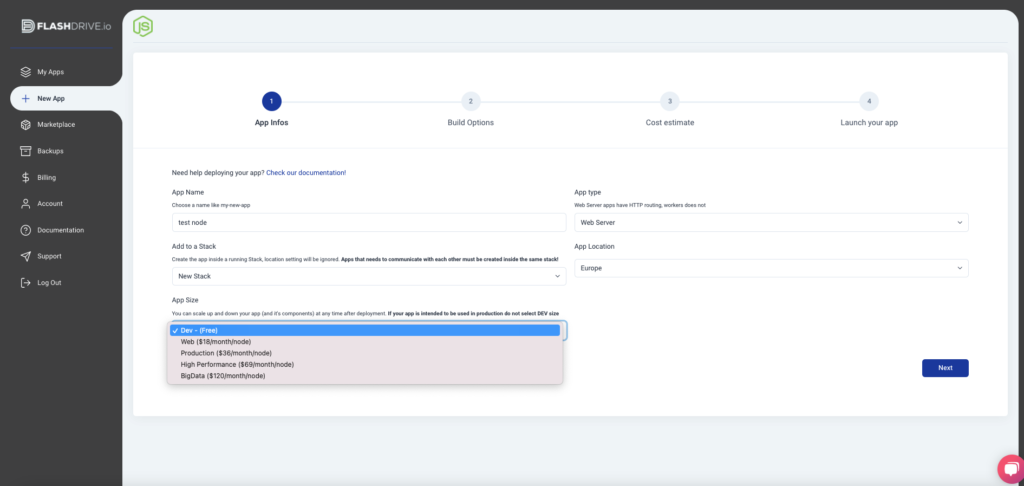
Create your app on FlashDrive
Usage of public repositories
FlashDrive can only build repositories attached to your Git account. Start by cloning the public repository to your Git account, add the specific files if they are missing, and continue with the automatic or manual mode below.
C
Automatic Mode
This mode is not available for Docker Apps
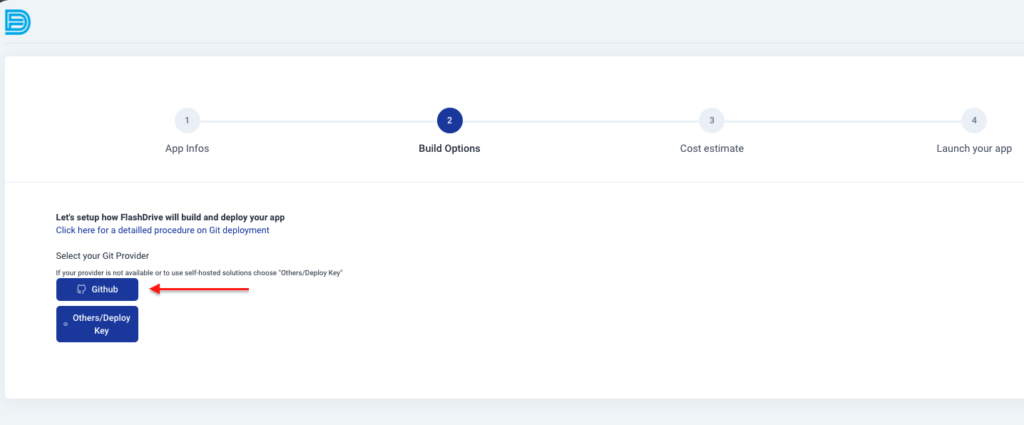
Select your Git provider when you create your app :
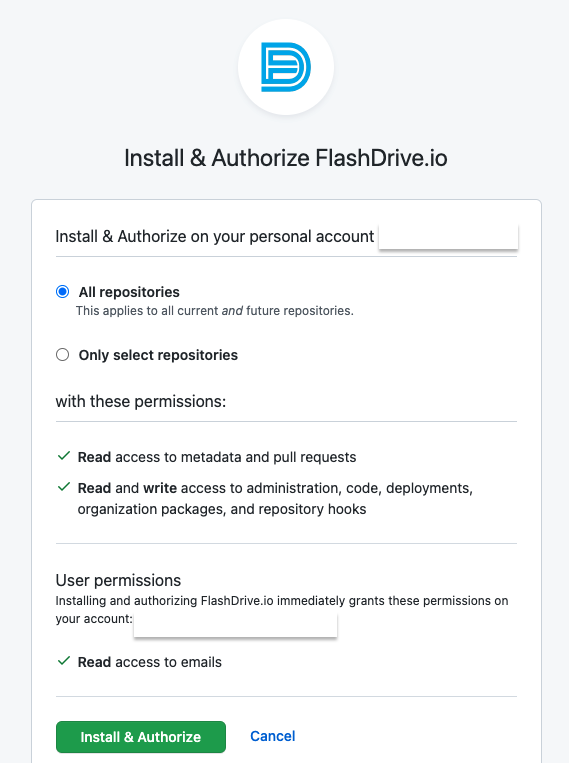
FlashDrive will redirect you to the login page for this provider, accept the permissions required to continue :
Once the app is installed you will be able to choose your repository and your branch from the list. If you need to edit the repositories FlashDrive has access to click on “Configure GitHub access”.
Manual Mode (using SSH keys)
The manual mode allows you to use any git platform like self-hosted Git repos or Git softwares that are not supported by the Automatic mode.
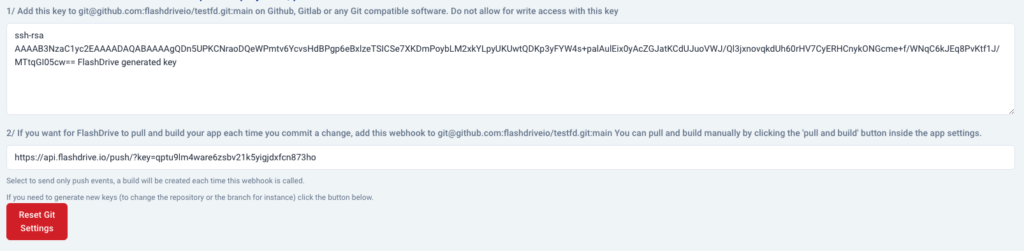
Each time you create a new app and set up Git deployment, a unique key is generated and must be added inside Git (Github, Gitlab, Bitbucket, etc…) at the Repository level. Do not use keys generated by FlashDrive for private repositories at your account level :
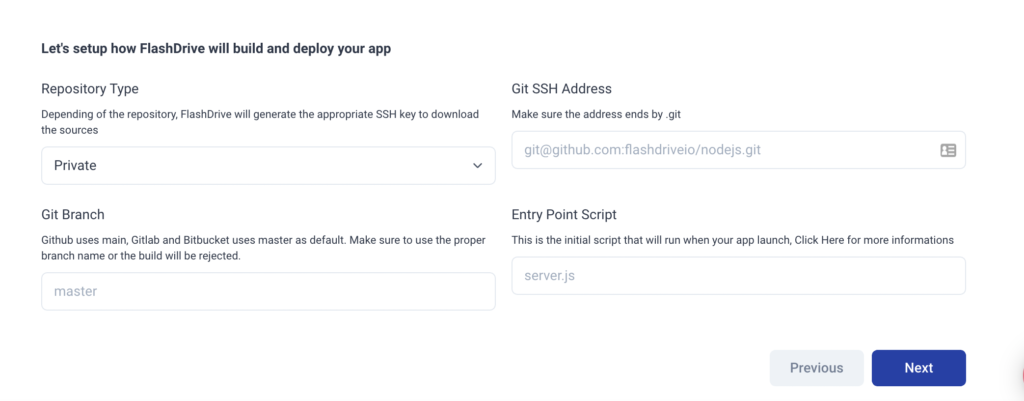
To find the Git URL and Branch, go to Github (or equivalent) :

After app creation, this screen will appear :
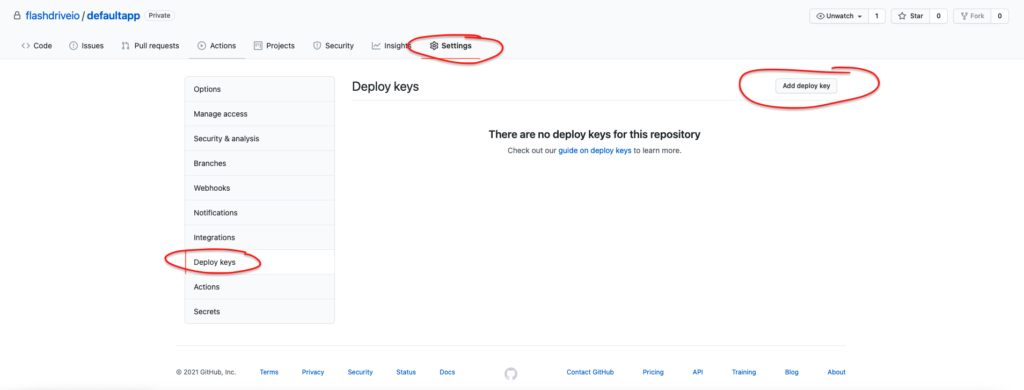
Go back to Github, and click on “Settings” on your repository menu and select Deploy Keys on the left menu :
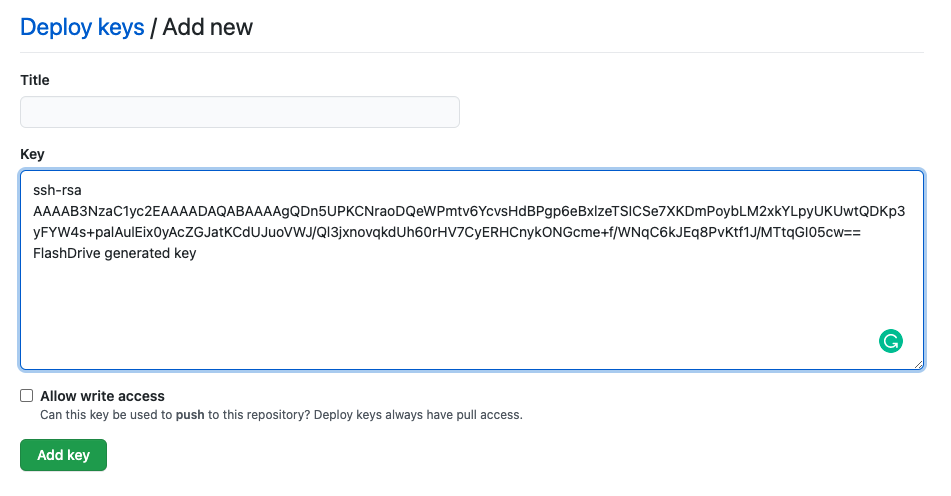
Click Add deploy key and copy/paste the key provided by FlashDrive. Do not give write access to this key :
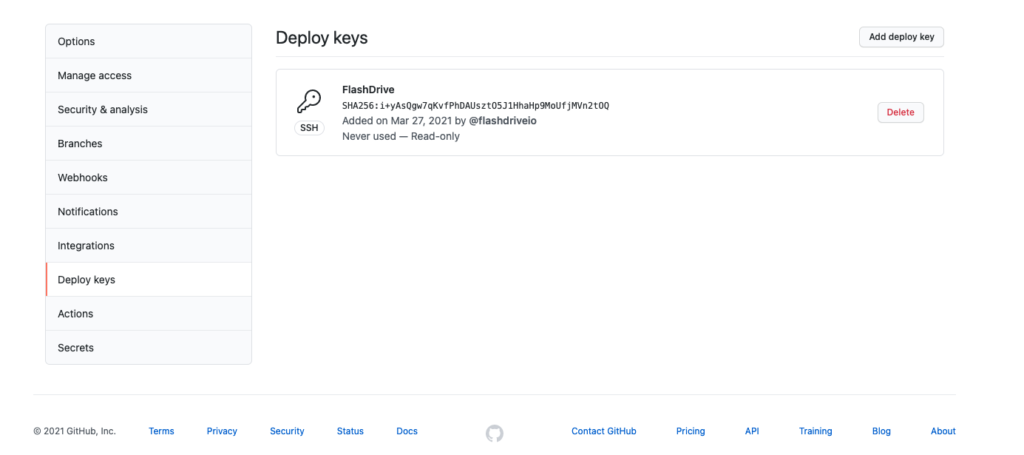
Click Add key and the key should now appear on the list :
If you want for FlashDrive to pull and build your code each time you push an update on your code, click on “Webhooks” inside the left menu and add a Webhook :
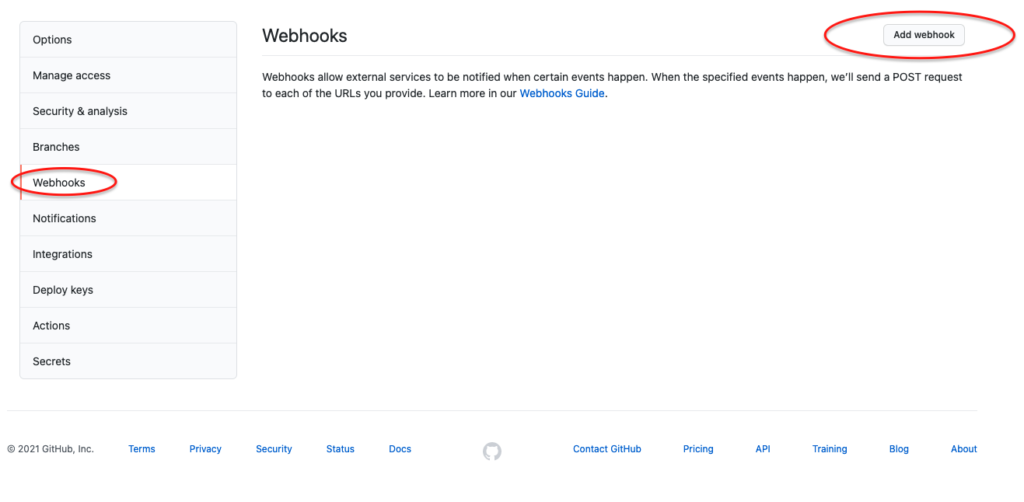
Copy/Paste the webhook URL provided by FlashDrive and make sure the push event only is selected :

Congratulations! Your private repository is now connected with FlashDrive and, if you added the webhook, your app will build each time you push a new version of your code inside the branch you selected.
You can create multiple apps with different branches completely isolated from each other.
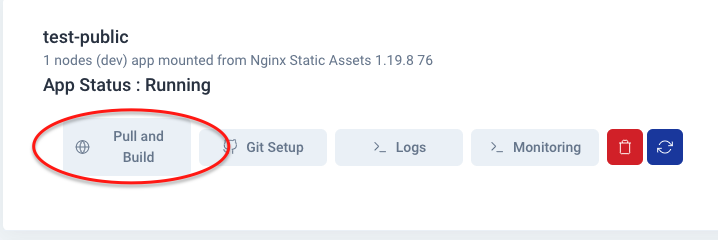
A new button “Pull and Build” will now appear inside your app settings, click it if you want FlashDrive to pull and build a new version of your code from Github :
Was this helpful?
6 / 4