This guide shows you how to deploy a complete Mastodon stack on Qoddi.
A typical Mastodon stack is composed of 5 apps:
- A Web-facing app (Mastodon Server)
- A Streaming app to interact with the federation (Streaming App)
- A Sideqik app to handle notifications and background tasks (Sideqik)
- A Postgres database
- A Redis database
The minimum cost to deploy a Mastodon stack on Qoddi is $30 per month; launching all apps of the stack is the tiniest size available (Starter, $6 per month per app). Starter is a production size meaning you will be able to scale all or some parts of your stack later on without having to change anything (we’ll see that in detail later on).
Pre-requisite before launching your Mastodon stack
Before you launch your Mastodon stack you will need:
- A verified Qoddi account with a credit card on file
- A domain name: that can be a subdomain and Qoddi will take care of adding SSL certificates and everything to Mastodon but a custom domain name is mandatory to be able to communicate with other Mastodon instances.
- An SMTP provider (we recommend sparkpost.com): this is mandatory; Mastodon sends a lot of transactional emails
- An S3 provider (we recommend Wasabi.com): this is optional but critical to grow your Mastodon instance in the future. Qoddi only includes 10GB of free data storage while Wasabi offers 1TB of block storage for $5 per month. Mastodon stores a lot of data so better starts with S3 right from the beginning.
Deploy Mastodon
To start, head to the Qoddi Marketplace and select Mastodon stack:

Select a name and location for your app, then on the following page enter the domain name your want to use with Mastodon.
Qoddi gives your immediately the CNAME that will be used with your app. It’s a good idea to add this CNAME to your DNS provider immediately so it have time to propagate during the installation. See this article for more details.
Review the total estimated cost for your app. Note that apps on Qoddi are charged by the second but will never cost more than the estimate:
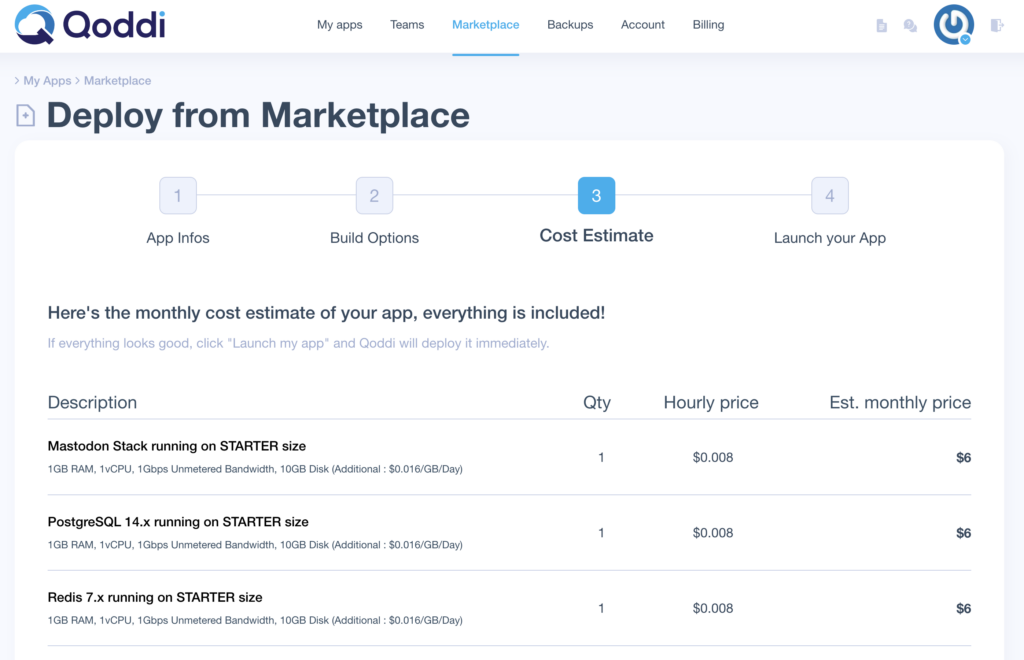
When you are happy with the result, click Launch my App.
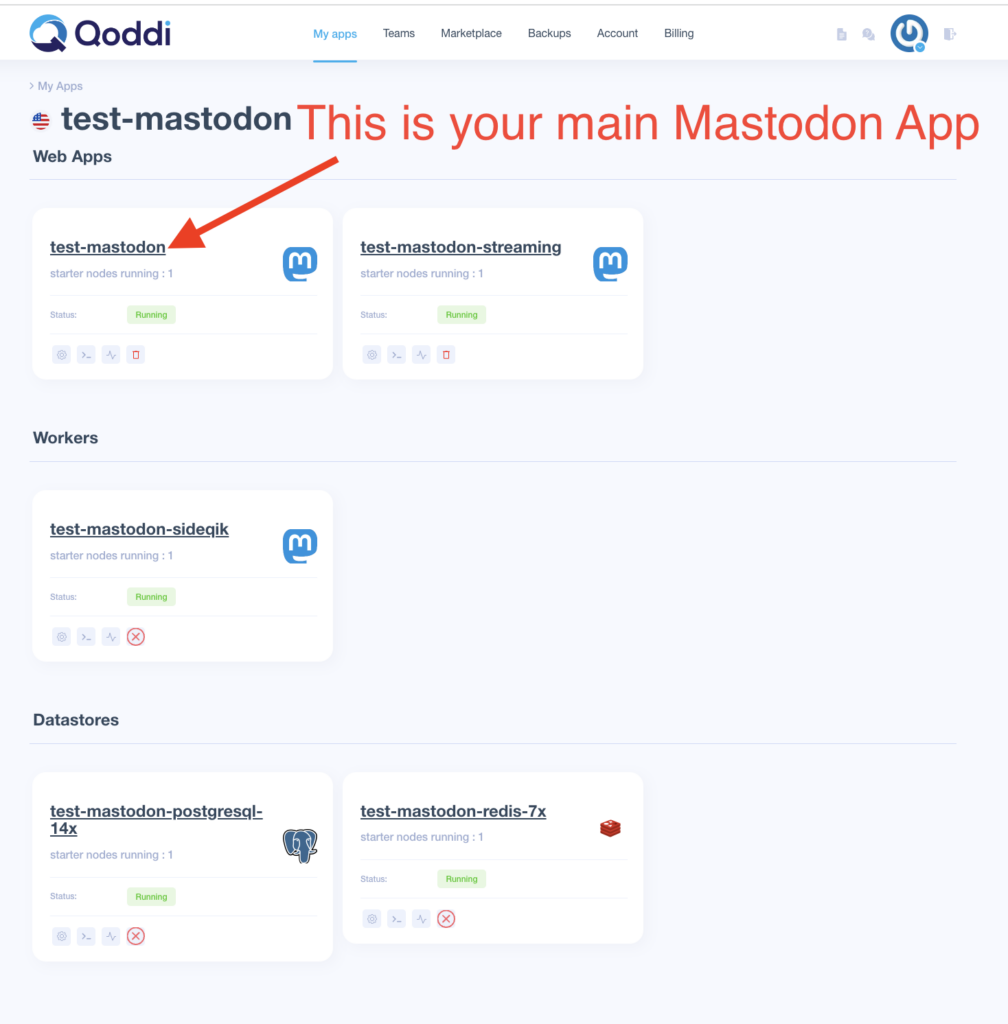
The installation of Mastodon can take quite some time. Once it’s finished, all your apps will have the status “Running”:

At this point, Mastodon is already installed and running!
Now, we must modify the configuration to add a SSL certificate and our SMTP and S3 provider’s details.
SSL Certificate
If you added it during the installation your domain name is already installed on your main Mastodon app (the first one on the left). Click on your app name to access the settings:
Click activate SSL in front of your domain name. Note: if the CNAME is not properly set, you will not be able to activate your SSL certificate:

With the SSL certificate installed, we’re almost done!
Add your STMP provider
Your SMTP provider will give you the identification details to send emails trhough their platform. You will probably need to verify your domain with them before sending emails with Mastodon, but the process is pretty simple.
Now we need to add several environment variable to all 3 Mastodon apps:
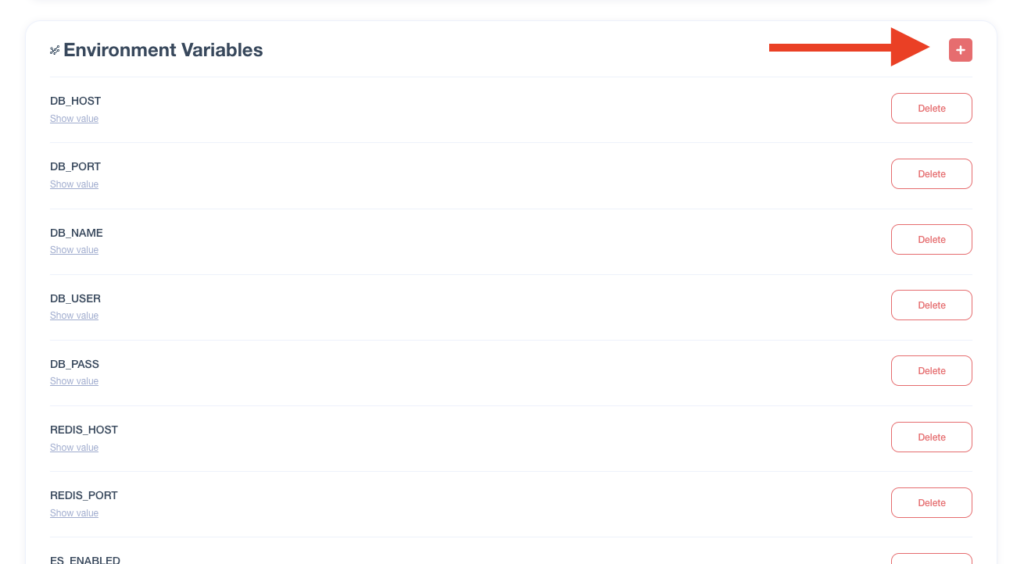
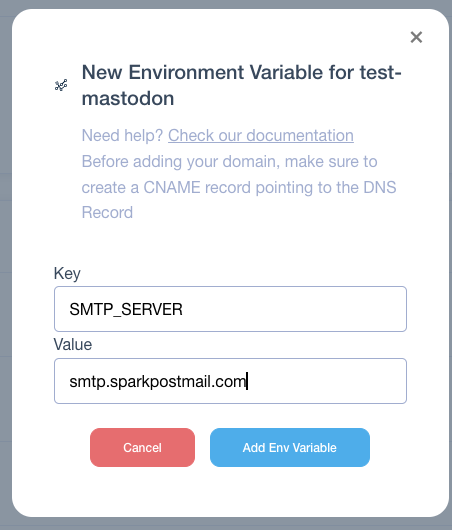
The environment variables are:
SMTP_SERVER | Address of the SMTP server. For sparkpost smtp.sparkpost.com |
SMTP_PORT | Usually, 587 but it can differ depending of your SMTP provider |
SMTP_LOGIN | Login to the SMTP server |
SMTP_PASSWORD | Password to the SMTP server |
SMTP_FROM_ADDRESS | Email address used to send email, must use your domain name (like [email protected]) and validated by the SMTP provider |
Important: this must be done on all of your 3 Mastodon instances (not required on Postgres and Redis instances).
Use S3 to store assets
Mastodon uses a lot of storage space to store assets, images, and videos, so it’s essential to use an S3 provider right out of the box. Remember that only 50GB are included with all Qoddi apps while additional GB is billed $0.016/GB/day which can become expensive really fast.
The first thing to do is to delete the S3_ENABLED environment variable (set to false by default):
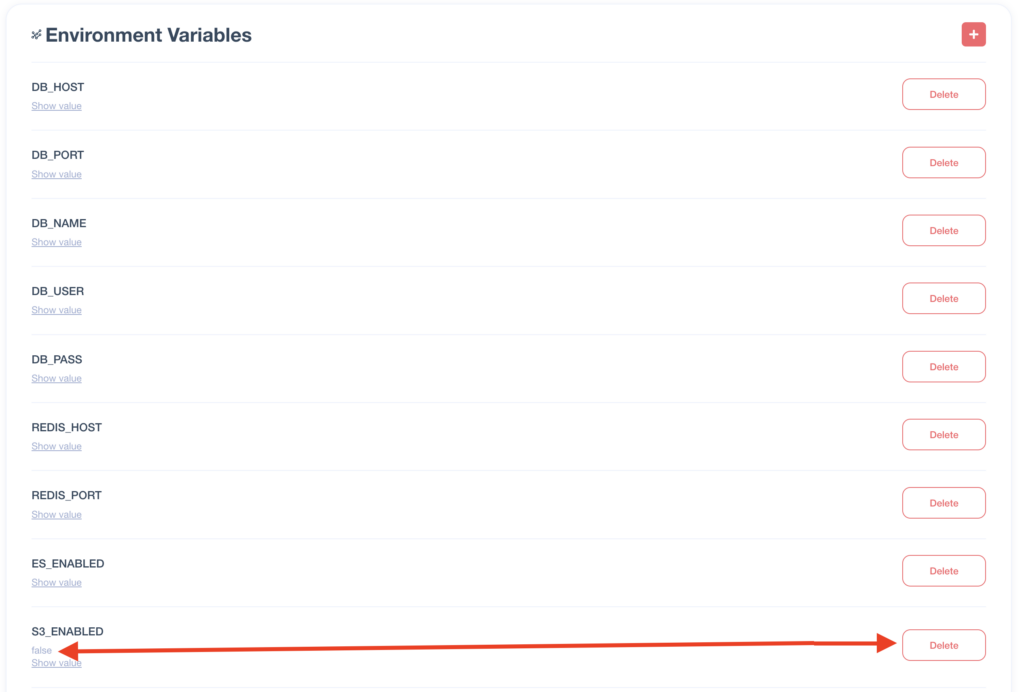
Then, set the following environment variables:
S3_ENABLED | true |
S3_BUCKET | S3 bucket to store data |
AWS_ACCESS_KEY_ID | Key sent by your S3 provider |
AWS_SECRET_ACCESS_KEY | Secret key sent by your S3 provider |
S3_REGION | Region of the bucket, like us-east-1 |
S3_HOSTNAME | Hostname of the S3 provider like s3.wasabisys.com |
S3_ENDPOINT | Endpoint of the S3 provider like https://s3.wasabisys.com |
Note: this must be done on all of your 3 Mastodon Apps
Finishing installation
Now Mastodon is completely installed. The only remaining step is to create your first user and make it Admin.
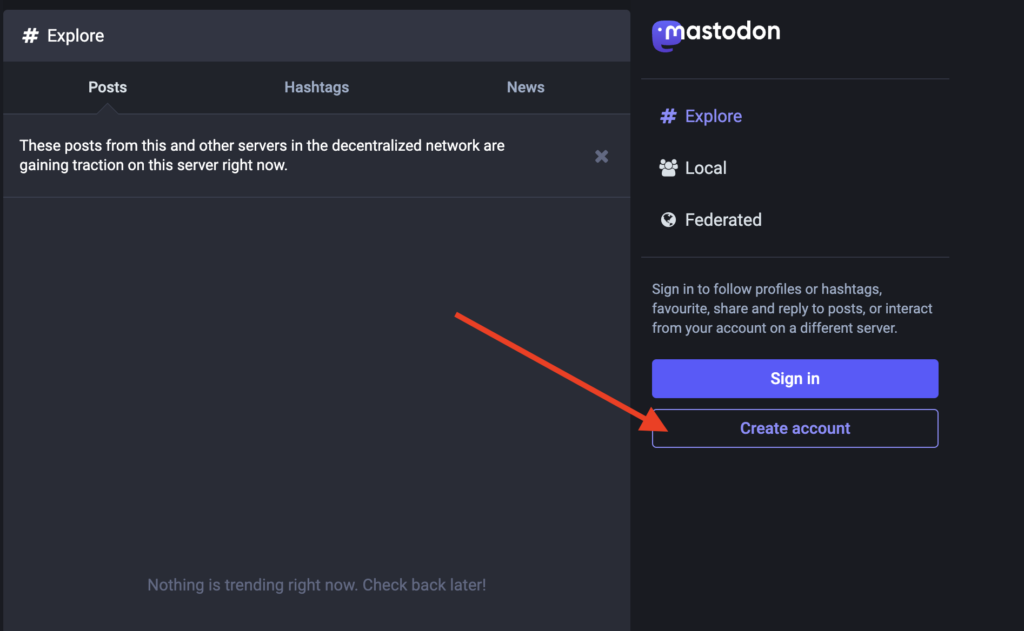
Go to your Mastodon domain and register an account:
Head back to your main Mastodon app settings page and launch this console command:
bin/tootctl accounts modify <user> --role Admin
Replace <user> with the username of the account you just created:
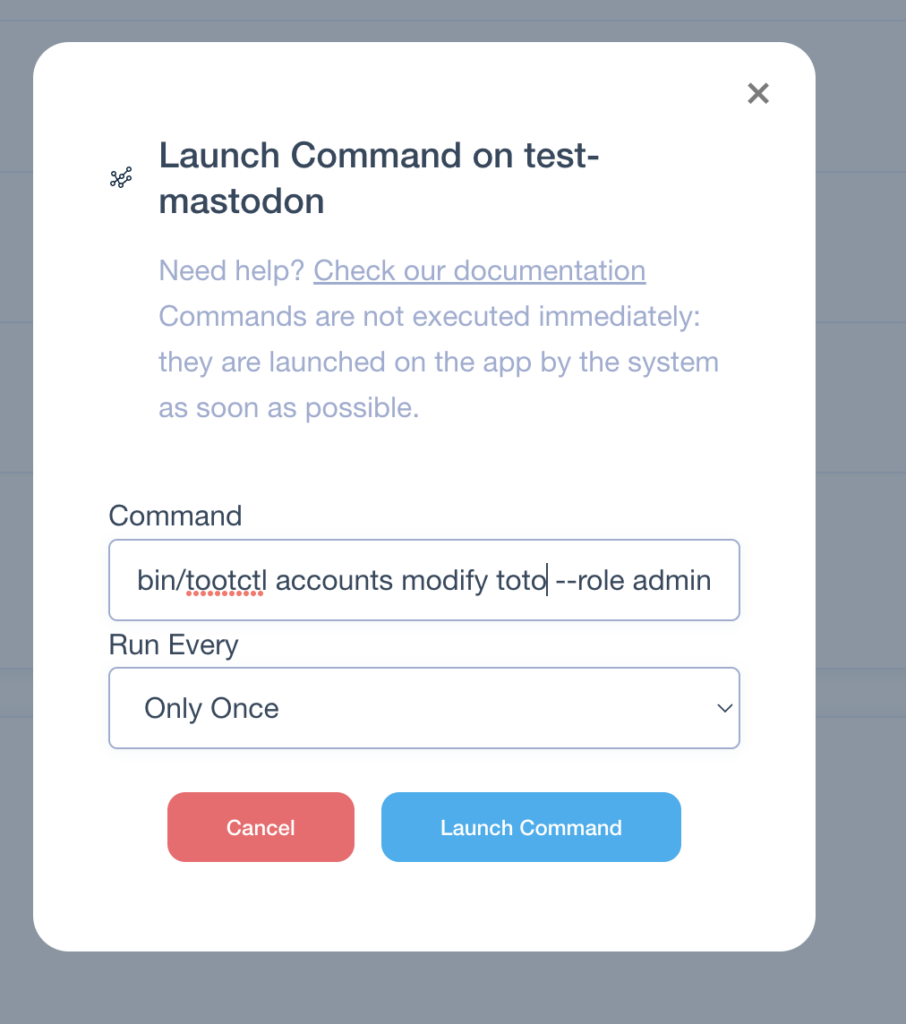
Choose to run it Only Once and wait for the command to be sent to the app. Once completed, you will see:

And… that’s it! Mastodon is now installed, and everything is set up. You can go to your Mastodon domain, login with your Admin user, and start to configure the details of your server.
You can follow @[email protected] and send us your Mastodon server 🙂
If something goes wrong?
If you see a 502 error it probably means that one environment variable is not properly set up. You can contact us via this form or use the Qoddi Community forum to reach out for help!
Was this helpful?
1 / 1