Migrating from Heroku to Qoddi App Platform is very easy and requires a small amount of time. This guide will guide you in the process on moving your app from Heroku to Qoddi, including databases, Redis and Docker containers.
Some add-ons are not (yet) available on Qoddi, like Sparkpost email sending library and may need to be included in your code using the language library. We do our best to onboard third-party add-ons on Qoddi as quickly as possible.
Qoddi works seamlessly with GitHub and supports most of Heroku buildpacks. The main difference between Qoddi and Heroku is that Qoddi doesn’t require any configuration file or CLI to use, everything is managed from the Qoddi dashboard.
Pre-requisites
- Create a free account on https://qoddi.com
- Add a valid credit card to your account
Migration Steps
- Understanding the difference between Qoddi and Heroku infrastructures
- Create your app on Qoddi
- Configure Environment variables
- Install Adminer to import data to PostgreSQL and import data
- Update DNS configuration
- Troubleshoot the build process
Understanding the differences between Qoddi and Heroku infrastructures
The way Qoddi and Heroku host your apps and route data inside the network is fairly different. Here’s what you need to be aware of before starting:
- Qoddi’s infrastructure uses a modern, serverless implementation. Only web data is able to reach your apps no matter the port used. Pay attention to the port your app uses to be reachable from the Internet and use the same port inside your app settings on Qoddi (that can be 80,8080, 3306 or whatever port your choose to use).
- Qoddi’s internal network always route the traffic depending on what your app needs. For instance it will never route web queries to a database and all the internal traffic is encrypted.
- Datastores created on Qoddi cannot be reached from the Internet, meaning you can’t connect to your PostgreSQL database on Qoddi from an app hosted elsewhere, this is by design and applicable to all datastores (including Redis).
Create your App on Qoddi
From the Qoddi dashboard click +, choose the size and location of your app and connect your GitHub repository. You can also select a datastore (Postgres if coming from Heroku) directly during the app creation phase, your app will have all the parameters to connect to the database automatically set up.
Configure Environment Variables
It’s critical to keep all sensitive information inside the Environment Variables instead of your code (like database passwords or third-party keys). Qoddi doesn’t support .env files and requires that all environment variables be created from the Qoddi Dashboard.
Install Adminer add-on for Postgres and Import Data
Adminer is free app available on Qoddi’s Marketplace to manage your PostgreSQL database. Click “Marketplace” from the Qoddi dashboard and launch Adminer inside the same stack of your database (if the database is created)
Adminer is created as a Web-App inside the same stack and can be accessed using the Qoddi’s URL.
To connect to your Postgres database check the internal name, username and password from the database settings page:
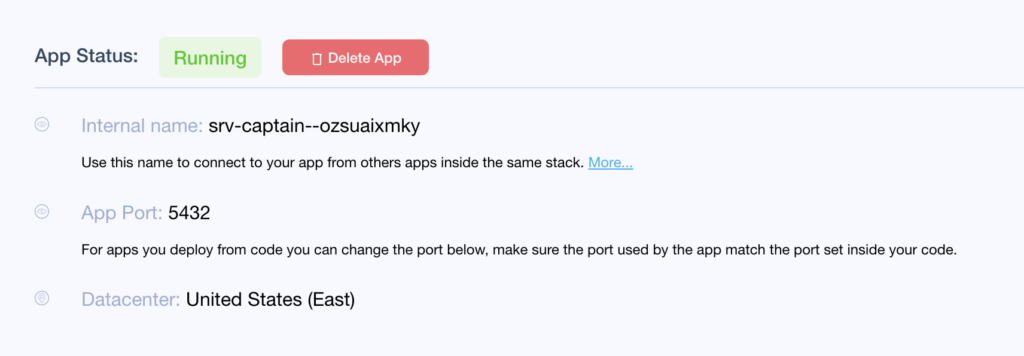
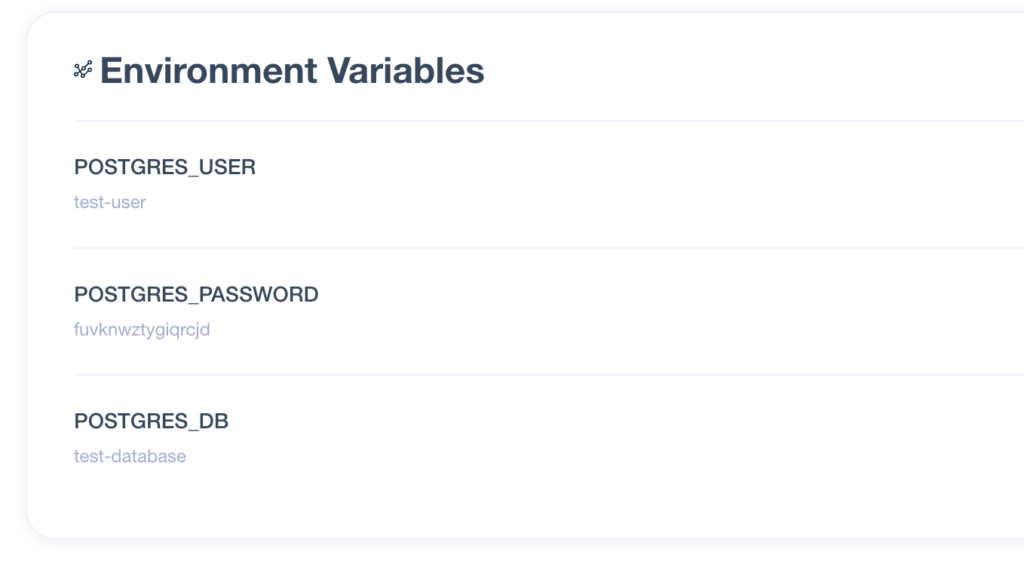
Use the same value to connect to your database using Adminer:
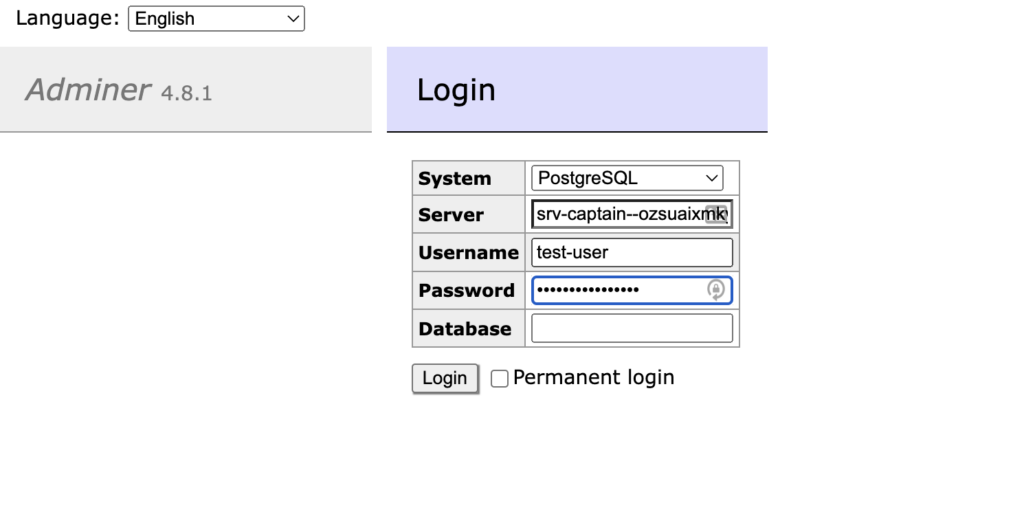
And voila! From Adminer you can import your .SQL file from Heroku.
Note : You can uses Adminer to connect to your Heroku PostgreSQL app directly from Qoddi to export your SQL file.
Update DNS configuration
Note: this feature is not available for Free apps
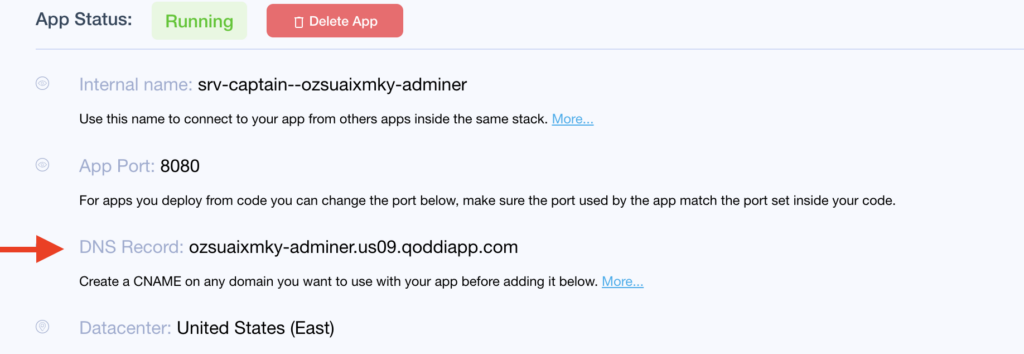
Add your domain name to your Qoddi app :

Copy the CNAME record and create a CNAME from your DNS provider (here’s a detailed procedure) :
Troubleshoot the build process
Visit the Deploy tab of your app to see the last deployment and access the build log. This will give you a detailed view of the build process and, if the build failed, the exact reason.
The log tab can also be helpful if your app doesn’t start. Most of the cases, it’s because the app port used by your code is different that the one set up by default on Qoddi; adjusting the app port will fix this issue.
If you have any issues, don’t delete your app yet! Most of the cases it’s an easy fix, contact us!
Was this helpful?
0 / 1